 Last week, I wrote about YouTube optimization, or what you need to do if you want your videos to attract viewers and get indexed in YouTube and Google search results.
Today, I’m going to show you easy ways to optimize your YouTube channel. This is similar to a website, with different sections and features. The only difference is, instead of a collection of articles and images, your channel will be filled with videos.
Just like creating a website, you have to consider your target audience first. What do you want users to know when they visit your channel? What videos do you want to feature? In which topic do you want to build authority? Think about these first before continuing with the steps below.
Optimize YouTube Channel Homepage
The channel’s homepage includes the channel’s name, description, icon, and channel art. To change these items, just hover your mouse over the item you want to change until you see a pencil icon.
Here’s an example from my account:

(I’m not yet using this account so it doesn’t have a lot of videos)
Channel Icon
The channel icon is the square image at the upper left hand side of your channel, and it will also appear as the uploader’s icon on every video uploaded to your channel. By default, your channel icon will come from your Google account.
Channel Art
Think of the channel art as the header image of your channel. You can use your company logo here, and even add some text such as, your video posting schedule and business phone number.
Just remember that the channel art’s size varies per device, so use an appropriate image size. YouTube recommends an image size of 2560 x 1440 pixels. Don’t max it out though, as parts of the image are cut off sometimes, depending on the device. The ‘safe area’ where you can put all the text and logos is at the center of the image, 1546 x 423 pixels.
Description
Your channel’s description should explain who you are, the type of videos you will upload, and what viewers can expect when they subscribe to your channel. Don’t forget to add keywords and a clear call to action.
Link Your Website and Social Channels
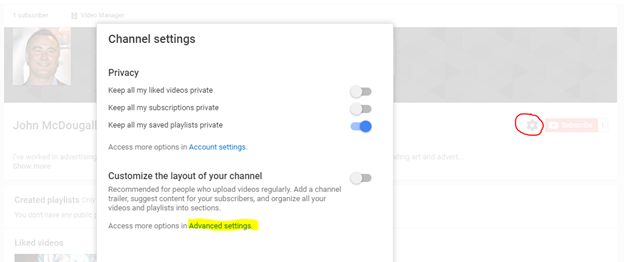
You can only do this after verifying your YouTube account. After that, click the gear icon at the right side of your description, then click “Advanced Settings.” From there you can enter the URL of your website and other social channels.
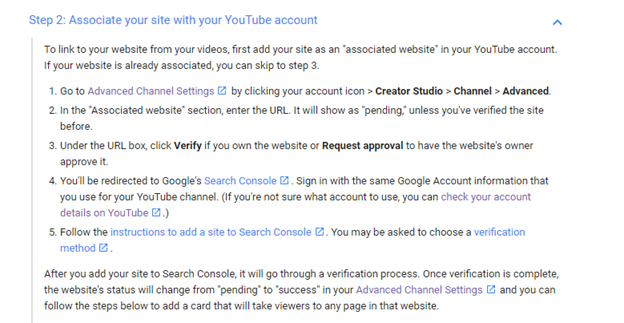
Here are the steps from Google’s support page:
You can also just click on the pencil icon that appears at the upper right hand side of your channel art, then click, “edit links.”
Here’s what it looks like once the links are added:

From HubSpot
As you can see the website and social icons are added as an overlay to your channel art.
Set Featured Channels
You can select any channel to feature, such as your other channels; channels you’re subscribed to, or channels you collaborate with.
You’ll see this on the right side of your channel’s homepage. Just click the pencil icon, and choose “edit module.”
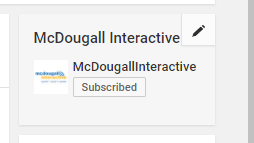
After that, you’ll see a pop-up window where you can edit the section’s title (i.e. Featured Channels, Related Channel, etc.) Below that you can enter the username or the URL of the channels you want to feature.
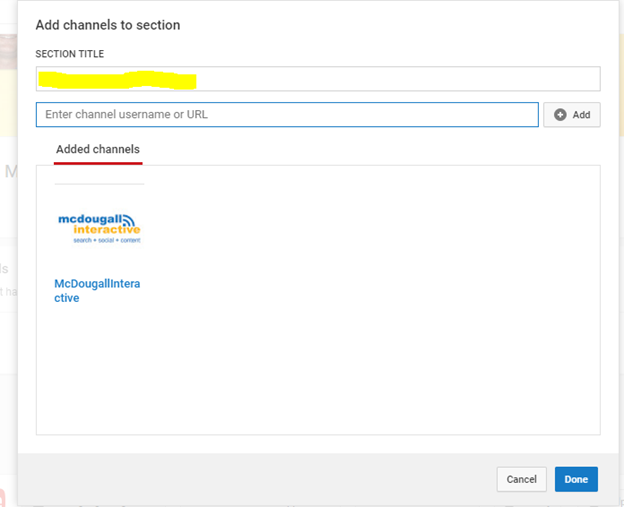
Here’s what it will look like once you add the featured channels:

Optimize YouTube Channel Using a Trailer for New Viewers
A trailer video is shown at the top of your YouTube homepage, but it only appears to viewers who are yet to subscribe to your channel.
Your trailer video can be about anything, but ideally it should tell new viewers what your videos are about, and why they should hit the subscribe button.
Tips for creating a hit trailer video:
- Assume the viewer has no idea who you are
- Start with a great hook to catch viewer’s attention
- Keep it short
- Demonstrate what you do, don’t just tell them
- Use annotations for your website and call to action
Here’s an example of a great trailer video from Brian Dean of Backlinko
Optimize YouTube Channel with Sections
Your YouTube channel can be organized into different sections, such as an about page, home page, videos, playlists, and channels. To enable this feature, click the gear icon on your channel’s description, then turn on the “Customize the layout of your channel” feature.
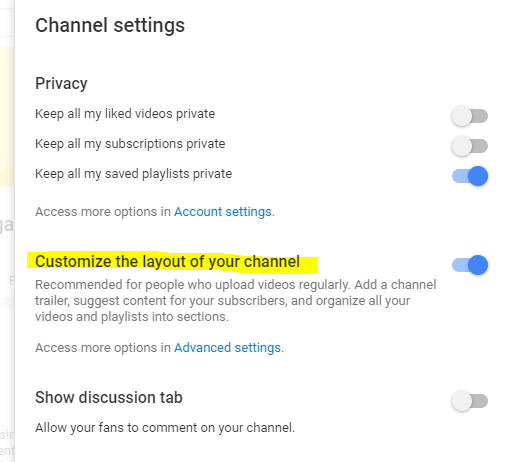
After that, you’ll see the following tabs below your channel name:
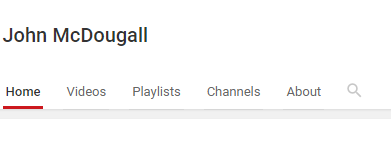
If you want to add a section, just click the “Add a section” button on your home page.

Then you’ll be prompted to choose the type of section you want to add, and the layout. Items under the “Other” and “Videos” section are filled by YouTube, based on your activities. The “Playlists” and “Channels” are populated according to the playlists you create and the channels you’re subscribed to. All of these can be chosen and added as a section for your channel.
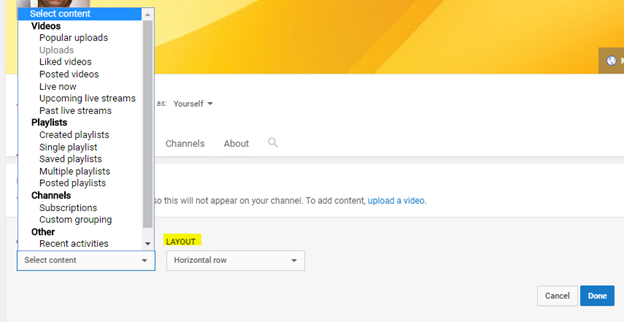
For example, let’s say the first section I want to add is my subscriptions. Here’s what happens when I choose that option:
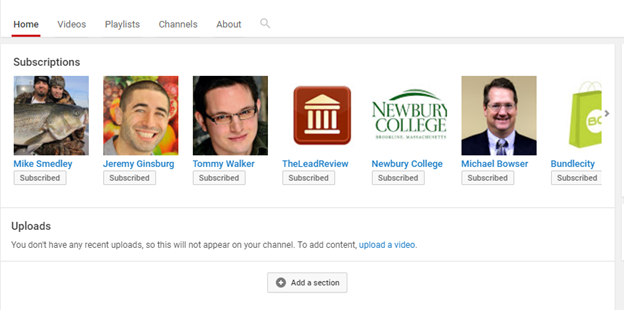
As you can see, my subscriptions are the first section you’ll see on my channel, followed by “Uploads.”
Be careful though, some devices only show the top section of your channel. So put all your important videos at the top section of your channel.
Sections can also include content from other channels, as in the case of subscriptions and playlists. You can use this to cross-promote content from your other channels, or build authority as a source for curated content in your niche.
Optimize YouTube Channel with Keyword-Rich Playlists
To create a playlist, just click the “Playlist” tab on your channel, then click “New Playlist” button.
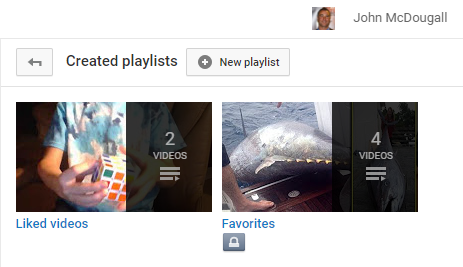
You’ll be prompted to create a playlist title, and then you’ll be redirected to a screen where you can add videos and a description to your list. Use keywords on your playlist title to help YouTube and Google determine what the videos are about.

For example, Neil Patel’s YouTube channel is neatly organized into different playlists, each with a specific keyword that immediately tells both viewers and YouTube what to expect when watching the playlist.

Allow YouTube to Recommend Your Channel
Enabling this option allows YouTube to show your channel to other viewers outside of your current subscribers. To do this, just click the gear icon on your channel, then click “Advanced Settings” then scroll down to channel recommendations and choose the “Allow my channel” option.

It Doesn’t Stop Here
Of course, as with anything to do with online marketing, it doesn’t stop here. There are many more ways to optimize and promote your YouTube channel, the ones listed here are just the basic and easy steps. If you want to learn more strategies to promote your videos, stay tuned for next week’s blog post, where I will show you how to promote your YouTube videos for better ranking and engagement.
