Discover what really works in digital marketing in a free 15 minute call. If you want better rankings in Google, meaningful social media results and to break the pattern of failed campaigns, talk to John McDougall today. John has helped hundreds of businesses of all sizes grow their web presence and authority since 1995. Become … Schedule Free Call
How to Build an Active Facebook Group Part 3: Managing a Facebook Group
Last week I showed you how to promote your Facebook group. By now I hope you’ve managed to it well beyond 10 members at least.
If not, you can skip this tutorial and try reading our other articles on promotion. I’m sure you’ll find useful marketing tips there that can also be applied to promoting an online community.
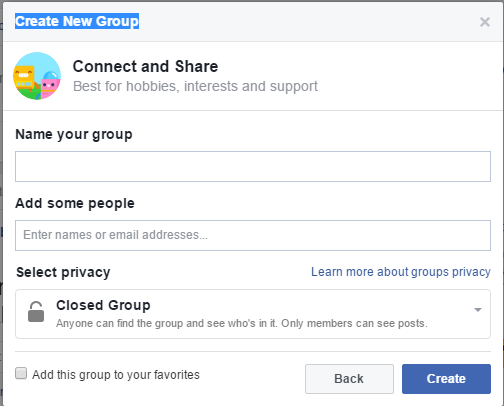
If you have more than 10 members though, this post is for you. I’m going to show you easy ways of managing a Facebook group with a low-budget.
Yes, I admit 10 members is nothing close to a hundred, or even a thousand members. But it’s better if you start managing your community early.
A Facebook group is only as good as its leader, after all, so it’s up to you to dictate the direction of your group—whether you want it to be an active and growing community, or one full of ads and spam with the occasional useful post thrown in.
5 Tips for Managing a Facebook Group without Going Insane
1. Assign an Admin
You can run a Facebook group on your own when you’re just starting out. But you might need some help once your group membership reaches over a hundred.
Answering questions, initiating conversations, approving membership requests, commenting on threads, and promoting your group can be a huge time drain. Yes, these activities will build your authority and personal network, but it’s time consuming to do it on your own.
While large groups tend to be self-sustaining, content or post wise, you still have to approve memberships, weed out spam, and mediate between members to avoid arguments. The more members you have, the more time you’ll have to spend on the group to keep it running.
Since the group isn’t your main business or source of income, it might be better to look for someone you can trust then assign them as admin. This way, you can focus on more important tasks for your business, and just occasionally drop by and interact with the group.
How to Select an Admin:
You can create your own criteria of who your ideal admin is, but in general you should pick someone who is:
- Available frequently to participate and do admin tasks
- Accept other people’s opinion
- Has good communication skills
Introduce your chosen admin to the group, so other members know that it’s official and this person isn’t just calling the shots without your authorization.
You can also decide how much power or authority your admin has over the group. For some groups, admins have the same power as the group’s founder, in other groups; they’re only in charge of moderating comments and removing spam.
If you ever have a disagreement with admin about handling of certain posts, keep it between the two of you. You don’t want your group members to witness any drama between you two.
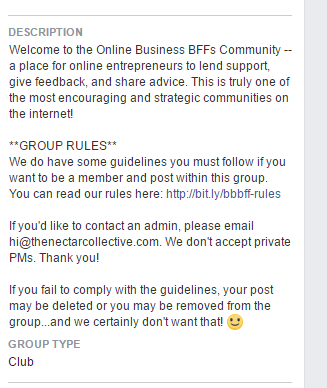
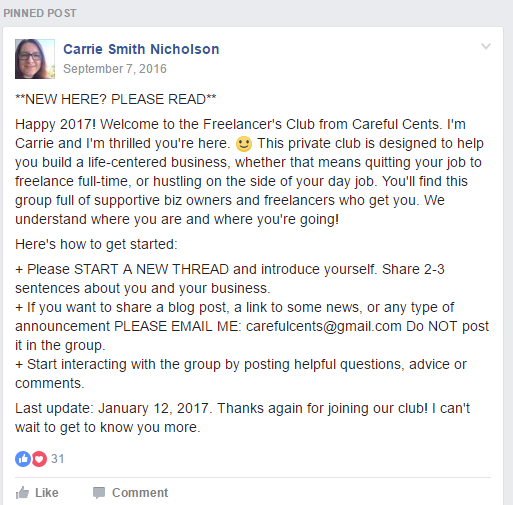
2. Write Clear Group Guidelines and Pin Them
Like peaceful neighborhoods, Facebook groups also need rules to maintain order.
In real life towns, these rules are local laws. While rules in your Facebook group aren’t legally binding, you are free to enforce them as you see fit because you’re the group’s owner. After all, fair Facebook group rules exist for the members’ protection—to keep the conversation flowing, while minimizing spam and member disagreements.
Set clear guidelines so group members can reference them if they’re not sure if what they’re about to post is allowed.
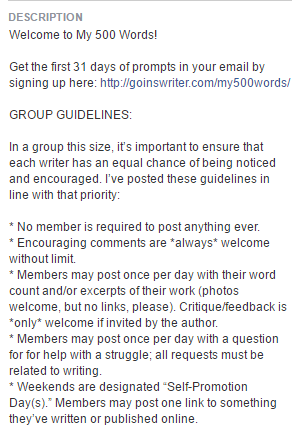
Include the following in your group guidelines:
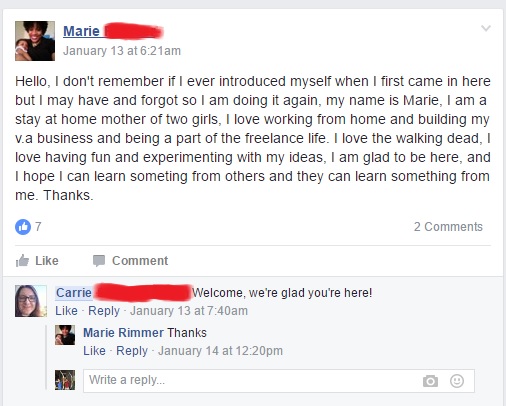
- Whether new members are expected to introduce themselves
- How group members are supposed to interact
- Whether self-promotion of blog posts, products, or services are allowed
- Types of posts or questions that are allowed
- Who are the group admins and what they’re allowed to do
- Information about group resources, such as articles, videos, and e-books you or other members have uploaded in the files section of the group.
- Reasons for a post to be deleted
- Reasons for a member to be blocked
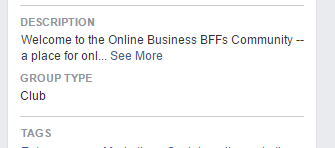
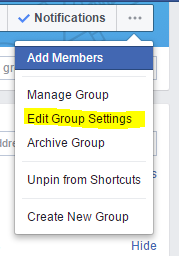
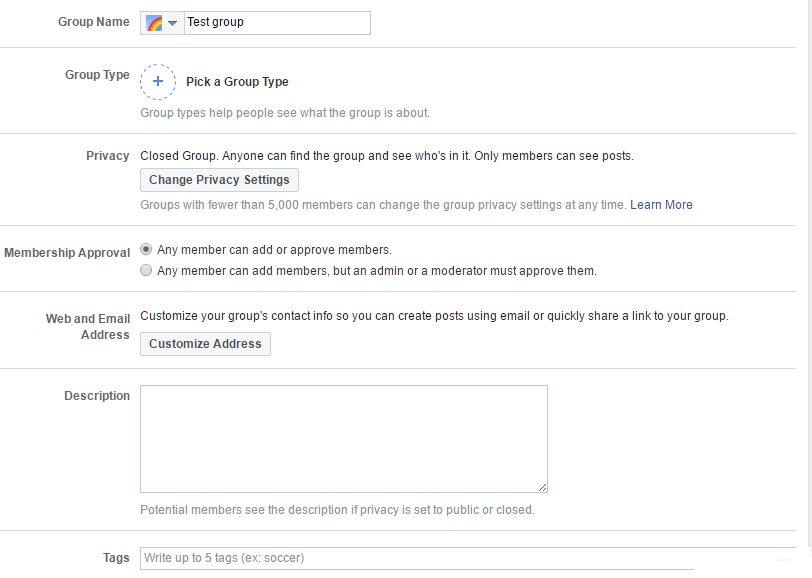
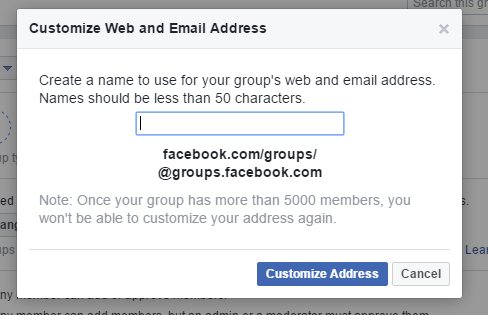
Since the group’s description is often cut off, it’s better to create the group guidelines as document in the files section of the group, then pin it as a post.


Alternatively, you can also write it as a post, then just pin it so all members see it at the top of the group.
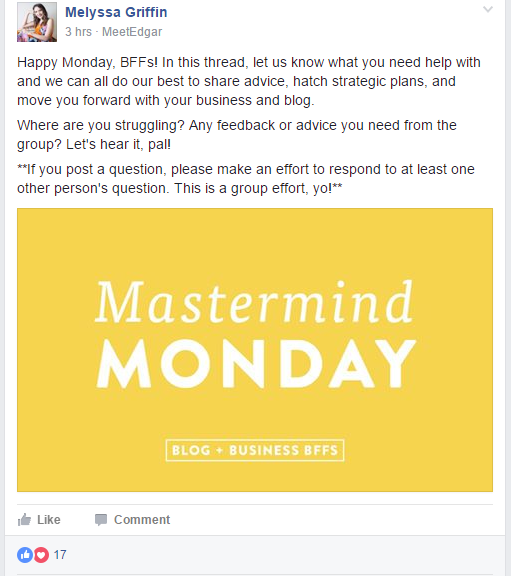
3. Encourage Conversation using Theme Days
There’s a reason theme days like #MotivationMondays and #ThrowbackThursdays became a hit. They make posting on social media fun, personal, and best of all, they take the pressure of coming up with something unique to post.
You can use popular theme days, or create some for your group. You don’t need to have a theme day for every day of the week though. So don’t worry about creating seven themes. Start with one or two themes to encourage participation and give your group’s conversation some structure.
Here’s an example of a unique theme day from Melyssa Griffin of Online Business Bffs:
4. Intervene on Heated Discussions Early
If you see a post or thread that’s causing tension between members, mediate early before it gets worse. Don’t let it run for 100 or so comments expecting members can find it in themselves to agree to disagree.
The thread will just heat up more and more as people take sides, and disagree with each other. Even if some conversations start out politely, it could turn ugly once someone feels offended.
You can be firm in closing conversation threads without sounding like a dictator. For instance, instead of just writing “I’m closing this thread” or “I’m not allowing further comments,” you can write “I think everyone has made their opinions clear on this one. Let’s leave it at that.” This way, members will see that you’re exerting you authority as the group owner or admin, without taking sides.
If the thread is too offensive, or if it violates your group’s guidelines, you can delete it then post an explanation of what happened to it.
5. Be Vigilant in the Fight Against Spam
Spam can kill your efforts in promoting a Facebook group. I’ve seen Facebook Groups that have nothing but posts from members promoting their own articles.
The result?
It’s a sad and lonely Facebook group where people hardly talk to each other except for business purposes.
There’s no community, friendship, accountability, or even friendly networking. It’s all about making a sale.
Of course, making a sale is also good but if everyone else is promoting themselves, it’s hard to stand out. That’s not the kind of community you want to build.
Because the group you created is closed, spammers shouldn’t be able to post there without your permission. A spammy post will slip through occasionally though. Some of these posts might even come from members who didn’t know about your rules regarding self-promotion.
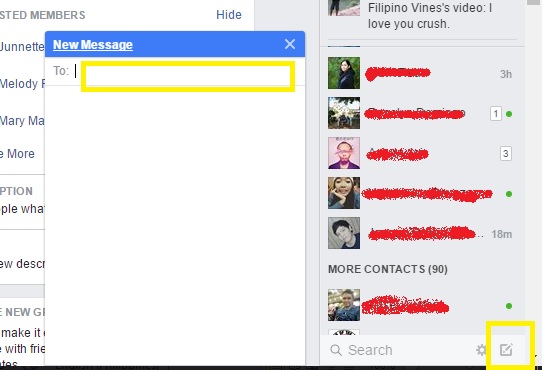
If that’s the case, delete the post then send a direct message to the offending member to explain why your decision. You can also point them to the group’s guidelines in the pinned post, or in your group description.
Worst Case Scenario: Removing a Member from the Group
I hope you won’t have to do this, but I also hope you’ll have the strength to do it if it needs to be done.
Remove group members who continue to violate your guidelines, despite several warnings. You might feel bad about removing them because you’ve worked so hard to get new members. But not doing so might cost you even more members.
If you do remove or block someone from the group, you have to explain it in a post afterwards to let other members know what happened. This is important, especially if the person you removed was an active part of the group. Explaining your decision in public will let other members know that you gave fair warning to the offending member, but you’re also not afraid to ban people if needed.
How to Build an Active Facebook Group Part 2: Inviting People and Promoting Your Facebook Group
Last week, I showed you how to start your own Facebook group.
This week, I’m going to show you how to grow your group into a thriving community of like-minded people.
But first, a word of caution: do not add your friends to the group without their consent. As easy as it is, and as tempting as it looks, don’t do it. That’s not one way to build your image as a spammer, and I’m sure you don’t want that.
You’ll just annoy your friends and drag down your group’s engagement rate. After all, if your members don’t want to be there, they won’t participate.
I’ll start off this guide with the easy steps then we’ll move on to strategies that might take a bit more time to implement.
7 Easy and Low Budget Ways to Promote Your Facebook Group
1. Invite People from Your Email List
Send an email to everyone in your email list to announce your group’s launch. Tell them what the group will be about and include a link to it.
The email doesn’t have to be long or complicated either. It could be as simple as:
Hi (Name),
I’m happy to have you here on (website name).
I just launched a new Facebook community for (who your target audience is) and I’d love for you to join us.
Group members will have exclusive access to strategies, tips, and training offers we have. You’ll also have a chance to ask us questions and network with other group members.
Here’s the group link: https://Facebook.com/Groupname
See you there!”
2. Add an FB Group Page Link to Your Website
If you have an existing Facebook page, I’m sure it’s linked to your website or blog. From there, just switch the link to your Facebook group.
3. Invite Your Facebook Friends to Join the Group
Spend a few minutes selecting friends and connections who might be interested in your group. Then write a message and send it to the people you selected in bulk.
If the group is for people working in a specific industry, you could use that as a hook for inviting people to join. The same applies to hobbies and other interests. Doing an outreach like this is a natural way to network and build authority in your personal network.
You can’t message people from the group. So you have to do it using your personal account. Just click the icon for ‘new message’ then start typing the names of people you want to invite.
Once they agree to join, you can manually add them to the group.
4. Do a Targeted Giveaway
Notice I wrote “Targeted” giveaway, not just any giveaway. Many marketers raffle iPads and of course, everyone wants the chance to win one.
You might get a lot of entries but at the end of the day, some of those entries won’t be from your target audience. They just want the iPad; they’re not interested in the community you’re building.
If you have a product, raffle two to three items. You can also raffle subscriptions, consulting sessions, or an e-book. You can even do what lots of travel and food bloggers do, ask sponsors for something you could giveaway.
Since your Facebook group doesn’t have enough members yet, you can announce the giveaway on your website and existing Facebook page, then put the contest and mechanics in your group. Because your group is closed, people will have to join to see it and participate in your contest.
In some cases, you don’t even have to host the contest yourself. Katrina Howe, for example, often posts links to contests held by different travel brands and gears on her group, Two Monkey’s Travels Forum.
5. Promote Your Group on Similar Facebook Groups and Pages
There are millions of Facebook groups out there, so it’s not impossible to find groups related to your own.
This strategy will only work if you have enough active members, at least 100, otherwise other group admins won’t even take notice of you.
First, find the following:
- 20 groups with at least 100 members that are also similar to yours
- 20 groups with similar members but slightly different topic. For instance, a group for social media managers might also be interesting to bloggers, SEO experts, and online business owners
Then join the group and start adding value. Answer questions that come up, link to giveaways they might be interested in, and ask questions yourself. An indirect bonus of doing this is you’re also building your authority in a new group.
After a few days, send a message to the group admin and ask if they’d be open to cross promotion. They promote your group on their group, while you promote them to your group. It’s a give and take.
6. Reply to Posts and Comments
No one will want to join a small Facebook group if even the admin isn’t active. You’ll really have to up your game in initiating conversations and replying to posts when you’re just starting out.
In the world of social media, replying to a member’s post is one of the best ways you can acknowledge them for being part of your group.
In the Facebook group The Careful Cents Club, group owner Carrie encourages new members to introduce themselves so members know each other. She also welcomes newcomers herself.
When other members see Carrie’s response, they see that it’s a welcoming community. Whatever hesitations they had about introducing themselves or asking questions will be gone.
7. Use a Challenge or Event to Group
Jeff Goins created the 500 Words Challenge to encourage people to write every day. Participants receive a daily writing prompt, and they can join the Facebook group he created to post their results and encourage each other.
This strategy grows both his Facebook group and email list.
Experiment with Other Strategies
You can use Facebook ads, Facebook live, and so many other strategies to grow your group. The ones I discussed here are the tried and tested—and low budget hacks though. Try these for now and experiment with other strategies later once you have a couple of members.
Next week, I’ll show you how to keep your group active and spam free.
How to Build an Active Facebook Group Part 1: Group Set-up and Optimization
I’m sure you’ve noticed, organic reach of Facebook pages plummeted. A study from Ogilvy showed that pages only reached about 6% of their followers in 2014, down from 16% from 2012.
So what do you do if you want to promote your business and build authority in your industry, but don’t want to spend thousands on Facebook ads?
Learn how to create a group on Facebook.
Facebook’s official response on the decline of organic reach blames the sheer volume of pages and content competing for a spot in a person’s newsfeed.
They’re supposedly limiting organic reach so that people who have liked multiple branded pages on Facebook don’t get swamped by promotional content on their newsfeed. They want to make sure individual users only see what that they’re interested in.
So it’s not that you shouldn’t share content on Facebook—they’re just selective of who sees your content. But if you can gather a group of people truly interested in your niche, then it’s a win-win for everyone.
That’s what Facebook groups are for.
Facebook Groups Give You Control
With Facebook groups, you have control over the group’s visibility and membership. Because many groups are private, members have the luxury of sharing information outside prying eyes of their family, boss, or friends.
You won’t be at the mercy of algorithms, too. Groups have the function to send notifications to group members whenever you post a new item.
How to Create a Group on Facebook
1. Who are Your Potential Group Members?
Sounds familiar? You’re not going to jump in and learn how to create a group on Facebook without first identifying your target audience.
This is the same question you have to answer every time you want to connect with people on social media.
You can approach this in two ways:
- Create a group that focuses on your business, including its products and services.
- Build a group catering to your target audience but don’t limit the discussion to your business. You’ll also touch on common goals, problems, and interests of your industry.
A Facebook group for a travel agency might also post links about working abroad, in addition to the usual travel tips and itineraries.
I wouldn’t say the first approach is the best. It all depends on your business and your goals. Here are pros and cons to consider:
Focus | Pros | Cons |
Your business |
• Tight-knit community of people interested in your product, services, and your expertise • More room for you to share your expertise with other members |
•Might have fewer members • Content shared might be less relatable to the general crowd. |
A wider subject matter for your target audience |
•More members •Opportunity to spread news about your brand to new faces •Cross promotion opportunities |
• Discussion might veer too far from your business •Might attract competitors and spammers |
Whatever you choose will affect the way your community grows.
2. Setup the Facebook Group
Go to your personal Facebook account, press the arrow down button and click “Create Group.”
Facebook will then prompt you to choose a purpose for the group. Choose “Connect and Share.”
3. Name Your Group
Use the name of your business or website.
But if you’re targeting a wider audience, choose a name that makes sense for the group’s goals as discussed in step 1. For instance, the name “Social Media Managers of New York” makes sense for a group of social media professionals in that state.
Then select “Closed Group” in the privacy options. You might think this will seriously limit your group’s reach.
Not exactly. Closed groups still appear on Facebook searches, but only approved members can see what’s happening inside the group. This setting accomplishes three things:
- Makes members feel special for being part of an exclusive group.
- Member discussions and threads are kept private. Their Facebook connections don’t see it unless they’re also part of the group.
- You can screen people who join the group to minimize spammers.
Next you have to add the first group member. Unfortunately, you can’t add yourself so you have to add someone else. Pick someone who won’t mind getting added temporarily then just remove them from the group later.
Don’t forget to tick the “Add this Group to your Favorites” option, so you can quickly see it on your Facebook profile sidebar anytime.
4. Choose a Group Icon and Cover Photo
This step is optional, but if you can find an icon that fits your group’s name then great!
After this, you’ll be redirected to your group’s official page. But you’re not yet done, you still have a few steps to go in making your group inviting for potential members.
First up is your cover image. If you’re creating a Facebook group specific for your business, use your company logo or at least a picture people will associate with your brand. Minimum cover photo size is 399 x 150 pixels.
5. Write an Optimized Group Description
Click on the ellipsis (…) beside the notification button then select “Edit Group Settings.” Then scroll down to “Description.”
Write a description that explains who your target members are, what they can expect from joining, and why you created it. Then introduce yourself as the group’s creator and moderator and link back to your website.
Write a description that shows you’re eager to connect with people that have the same interests, or works in the same industry. Yes, you want to build your authority and promote your business on this page but you don’t have to be blunt about it. Emphasize your willingness to help and make connections instead. No one will join your group if it reeks of self-promotional content.
You can also include a group vision or guidelines so members will know how they’re supposed to behave in the group. Doing this minimizes arguments and spamming from members.
Below is an example from the Facebook Group My 500 Words.
Sprinkle your description with keywords (aka Tags) so your group will appear in search results for those words.
Then choose up to 5 tags that Facebook will use to identify what your group is about. For example, if the group is about swimming, you might use tags like swimming, underwater, diving, exercise, and freediving.
6. Optimize the Group’s Settings
You’ll be prompted to customize a few settings, such as:
- Group name
- Group type: Facebook gives you different options to categorize the type of group you’re creating. For most businesses though, the best option is “Custom” since you’re creating a group to connect with potential customers but “Buy and Sell” doesn’t exactly fit your group’s description.
- Privacy settings
- Membership approval: Can other members approve or invite other members?
- Web and Email address: Choosing a Web URL gives your Facebook group a customized URL instead of a bunch of random numbers.
Facebook will automatically give you an email address based on your chosen group name. Emails sent to that address will appear as posts on your group.
You can also change…
- Posting permissions: Can members post or will it be limited to admins only?
- Post approval: Do admins have to approve every post? This is only a good idea if you already have thousands of members in the group. When you’re just starting out, you want to initiate and encourage conversations, not censor them.
Next Step: Scoring Your First Group Members and Ramping Up
Voila, you’ve created your own Facebook group. Yes it’s totally empty right now except for that unknowing friend you just added. But that’s okay, because next week I’ll show you how to promote your group and get more members.
Do you feel that Facebook groups are a worthwhile investment or too much of a time commitment? Let us know in the comments below.
Warning: 4 Content Marketing Mistakes even Smart Law Firms Make
What’s worse than a law firm not having a content marketing and social media strategy?
A law firm with a marketing strategy that’s poorly conceived and executed.
You probably know what I’m talking about.
A strategy where blog posts are automatically pushed to their social media feeds, with little to no thought about engagement and timing. And that’s just one of the common mistakes I’ve seen online—it’s not even an epic mistake.
Anticipating and preventing mistakes is a common skill among lawyers. But I also know marketing isn’t a specialty for many professionals in the legal field. Besides, everyone makes mistakes.
So I thought I’d help you out. In this article, I’m going to point out content marketing mistakes you should avoid—if you want your marketing efforts to pay off.
Are You Committing Any of these Content Marketing Mistakes?
1. Promoting Services Too Soon
Each of your blog post ends with a call to action to for a free consult. Your subscribers often get emails with strong, almost forceful prompts to buy your book or call for a consultation.
It sounds obvious but it bears repeating, don’t over promote your services at the end of every blog or social media post. Adding a link to a related post or downloadable guide on the same topic is better.
You won’t convince anyone with a hard push strategy in this day and age.
Legal clients, like other consumers, have a buying cycle.
- Awareness: They know there’s a problem, or they’re anticipating a problem.
- Consideration: The prospect starts looking for possible solutions, including comparing services from different legal counsel.
- Decision stage: Choosing whether to avail legal counsel, and who to trust with their case.
Your content should take all these stages in consideration. For the awareness stage, you should have plenty of blog posts, white papers, or e-books to educate prospects.
Your strategy for the consideration stage should include comparison of legal firms and their services, testimonials, and other credibility boosters.
2. Relying on Quantity
Content, whether that’s blog posts, infographics, or video, created just to make your website seem active is a waste of time.
If you didn’t take time to consider its relevance, accuracy, and informative value—its quality—it can damage your content marketing efforts. Your readers might start thinking of your site as a source of unreliable content, or worse, a spammy site. That’s a huge blow to your authority in the legal marketing industry.
The solution is simple. Produce quality content that’s both educational and fun to read for your prospects. While it’s tempting to focus on the legal aspects of your practice, how-to articles and tips aren’t enough to make you stand out.
Why? Your competitors are writing about those, too.
Things to Consider Before Hiring a Divorce Attorney? Check.
How Soon can I Get Spousal Support? Check.
Who is Responsible for a Serious Bus Crash? Check.
Sure, write about the basic stuff and the FAQ. But don’t forget to include a human element your readers can relate to.
Attorney-client privileges prevent you from divulging case details in a blog post, but that shouldn’t stop you from drawing inspiration from multiple cases and writing a fictitious story. Like the Law and Order series, you can add a disclaimer at the bottom of your post saying that all stories are fictitious and any resemblance to cases are coincidental.
Photo credit: Disclaiming Disclaimers
You can also add a human element to your post by capitalizing on ongoing cases, news, and scandals, like a law blog that wrote about Brangelina’s divorce.
3. Not Having a Target Audience
With that in mind, chose blog post topics strategically. If you’re a divorce lawyer in New York, don’t write a lot of posts on trending divorces. You don’t want readers mistaking your site for a gossip blog!
If you do this, people will search online for updates about the case and read your blog to devour the latest about that scandal, instead of getting legal information. Do this once in a while but don’t lose focus on the legal aspect of the article—the celebrity angle is just your news hook!
Remember, who your target audience is.
Here are 2 topic ideas if you use Brangelina’s divorce as a news angle and human element, while keeping the post informative:
- Will Angelina Get Alimony? Learn the What, When, and Who of Spousal Support
- Brad Pitt and his Kids: Domestic Violence and its Effect on Custody Battles
Knowing who your target audience is makes producing and distributing content easier. Target demographics, socio-economic status, goals, and interests play a huge part in understanding what they want to read—and how that can influence your perceived authority in their eyes.
4. No Distribution Strategy
Greentarget’s 2014 digital marketing survey reveals that only about 25% of lawyers have a documented content marketing strategy. For an industry that puts a high value on documenting everything, that’s a disappointment.
So you write a blog post then publish it on your website and promote it to your social followers. What then?
A few months later, it’s gathering virtual dust bunnies in your archive. Same goes for infographics and videos you created.
That’s such a waste. Not having a documented content distribution strategy hinders everything you create from ever taking off in the digital world.
For how can it bring you more followers and subscribers if it’s only promoted to your current social circle? Try one of these strategies then add it to your content promotion repertoire if it works.
- Try promoting your blog posts and white papers through a low-budget LinkedIn or Facebook ad campaign. A $10 to $20 budget per post is fine for starters.
- Reach out to relevant but non-competing websites to ask if they’d be willing to share your content. It has to be a good fit, of course. If you’re a divorce lawyer, a parenting site or mom blog will do.
- Start commenting on active Facebook groups. Promote your post after a few days with a caption about how you think it might be a good read for group members.
Your Content Pieces are Your Digital Assets
You’re creating quality content now, so you should treat it as an asset. Maximize the benefit of one content post by repurposing it. For instance, a webinar created to answer FAQs about your practice could be turned into a blog post, then a Slideshare, and fed into your social media accounts for once a day postings spread over a week.
Yes, all of this takes time to implement. But it pays off better compared to writing article after article, with little content marketing strategy and then not promoting any of it.
Twitter for Beginners Part 3: How to Use a Twitter List and Twitter for Customer Service
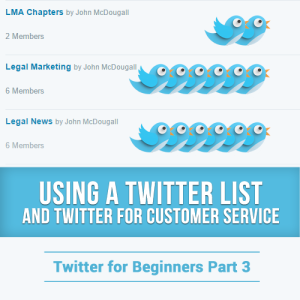
Last week, I gave you several tips to build your twitter following. Some of the strategies were easy, like adding a picture with your Tweet. Others required a bit of creativity, like sharing your thoughts in interesting twitter conversations.
Today, as promised, I’ll share different ways to use Twitter for your business—and not just in growing your brand and marketing your products.
Who do You Follow on Twitter?
Friends? Colleagues? Customers?
Following other twitter users is one of the easiest ways to get a following.
But sometimes, it’s hard to choose who to follow. You want to connect with more interesting people but don’t know where to start.
You can:
- Follow random people Twitter suggests.
- Follow influential people in your industry
Hands down, I recommend option two.
Now the next question is how do you find those influencers and thought leaders that will make your Twitter feed a little more fascinating to read?
Enter Twitter Lists
As mentioned on part 1 of this tutorial series, a list is a group of Twitter users curated for a specific reason. You can create a list of your favorite authors, business competitors, vendors, and just about anything you can think about. You can also subscribe to other people’s list.
Your list will show you a collection of tweets from users included on it, so you can engage with them.
To create a list online:
- Click on your profile picture
- Click on “Lists”
- Click “Create new list”
- Name your list: the name can’t start with a number, and exceed 25 characters.
- Choose private if you don’t want anyone to see it, or public if you’re okay with allowing others to subscribe to it.
Not sure who to add on your list?
Brainstorm using the following questions:
- Who do I want to engage with? Customers? Prospects? Competitors? Thought leaders? Create a list for each category you think of.
- Create a twitter list using each of the categories you decided in step 1. You probably already know who your customers, prospects and competitors are, so just look-up their Twitter handles and add them up on your list. Set your list of customers and sales prospects as ‘private’ to avoid potential problems.
- Finding influencers and thought leaders might be harder, so I’ll cover that in the next part of this tutorial.
Finding Influencers and Thought Leaders
To make things easy, let’s start with finding five industry thought leaders. This is just to get started, after you complete these steps your twitter list will definitely have more than five people on it.
- Using Klear, search for Twitter users based on your industry’s category and location
- Narrow down the list using the filter for low response and activity to weed out inactive users.
- Then filter it using influence to pick “Power users” to see who’s most active and then later on using the “casual” filter to see the top 20% to 50% of users in that industry. In the example below, I’m searching for followers in the legal industry.
- Pick 5 people from the search results on “casual” and another five for the search results on “power users.” This way, you’ll have a list of casual users you can like, RT, and share content from. Once you build up a decent following of casual users, it’ll be easier for you to engage with (and get a follow) from other power users.
Check the Lists of Your List
We’re going to find more thought leaders from this initial list of 10. How?
Simple: Mine their lists for other influencers. If one of your chosen power users follows another attorney (or is subscribed to a list of other attorneys), you can bet that person is worth following, too.
From here, you can pick list members worth following or follow all of them by clicking “List members.” Another option is to subscribe to the list, which is easier than following individual members one by one. But subscribing doesn’t give you any control of the list. If the list’s creator adds or removes someone, you’ll see it too.
In the search I did earlier, Riverview Law came as one of the top 16% of responsive Twitter power users. After checking their lists, I found more thought leaders in the legal industry, specifically a list of criminal lawyers, Intellectual Property lawyers, and barristers list.
Finding Influencers isn’t the Last Step
Which brings me to the next step of this tutorial: getting an influencer’s attention.
You can get an influencer’s attention through consistent engagement. That means RTing their posts, mentioning them on tweets, and replying to their posts. Not all of it, but those your own target audience will find useful. I’m sure you can find a common ground between the two.
When RTing their post, add a comment to make your RT stand out. Something as simple as “great post” or “I agree with this” or “I like tip #7” will be appreciated.
The goal is to start building an online connection to them, while curating valuable information your own followers will appreciate. Pretty soon, you’ll get an RT from them, a reply, and some might even follow you back.
Using Twitter for Customer Service
Another important, but sometimes challenging to execute function of Twitter is customer service.
Using Twitter for customer service is easy and low cost. The downside is @replies and @mentions from customers can be seen by others. So a bad customer service can spread like wildfire.
On the flipside, that means providing good customer service can be a source of good publicity.
4 Easy Tips for providing good customer service via Twitter:
- End tweets with your name, or whoever is tweeting on behalf of your account. Doing this personalizes your tweet, so users don’t feel like you’re hiding behind a corporate logo. It feels like they’re chatting with you one on one that way.
@the_supertrolls Hey there! Great question! We’re you looking for an app for Windows mobile? -Dave
— Buffer (@buffer) December 5, 2016
- Solve problems with the shortest number of @replies as possible. This not only minimizes your work, but also minimizes confusion for other users experiencing the same problem (i.e. website error, or any problem that affects a lot of customers).
Why? If you @reply to everyone who asks the same question (i.e. “Is your website down?”), the users who look at your Twitter profile in hopes of figuring out what is going on will have to scroll through a lot of your individually sent @replies, before seeing your original reply or announcement regarding the problem.
- When you realize there’s a problem, tweet it in public then pin the post at the top of your feed so others experiencing the same problem sees it first.
- For regular support problems and massive problems, ask users who tweet you via @reply to your original tweet, or as @mention by tagging you in their tweet, to send you a DM. This minimizes public confusion and negative reviews on your stream. It’s also easier to solve problems individually via DM.
Other Ways to Use Twitter for Your Business
Offer a Twitter Only Special- is your business seasonal? Maybe you sell winter gear, so you don’t have a lot of foot traffic around summer. Or maybe your coffee shop seems to be empty on certain nights. Use Twitter to offer a special deal for everyone who uses the secret code you’ll tweet out at a pre-specified time.
To maximize exposure, hint about the code with several tweets announcing a special. For instance, today you can announce that you’re having a special event and ask guest stay tuned the next day.
The day after that, announce that you’ll be tweeting a special code to get a discount or free upsize) to users use the code you’ll tweet the next day.
Conclusion
Twitter is a great tool for building your authority and there are a lot of different ways to use it. Some of the top authorities don’t “have” to follow anyone and yet they have hundreds of thousands of followers. When you’re getting started however, you are likely going to need to experiment with different tactics to find what works for you.
Whatever you do, be sure to be yourself and share things that your audience will find useful. If you start with the attitude of being helpful, all of the technical elements will eventually fall in line.
- « Previous Page
- 1
- …
- 4
- 5
- 6
- 7
- 8
- …
- 30
- Next Page »